
Walkthrough Video #
Onboarding video walkthrough – Step One #
(before the Background Check is complete, if this role requires it):
Onboarding video walkthrough – Step Two #
(after the Background Check is complete, if this role requires it):
If you get stuck, please reach out to our support team: support@raiserecruiting.com.
🇨🇦 This document is for Independent Consultants in Canada –
- If you’re a Contract Employee in Canada, please see this support document instead.
- if you’re a W2 Worker in the US, please see this support document instead.
First time only: set your password and sign in #
- Look for the welcome email from support@raiserecruiting.com with a link to set your password.

- Choose a password, enter it again to confirm your password, and you’ll be signed in to the Raise app.

- Once you’ve chosen your password, you can sign back in at any time by clicking Sign In in the top right corner of this website.
- Depending on the company and the role requirements, you might receive a link to complete your background check directly from the background check provider, which will be handled by them and not inside the Raise app.
Step 1: basic information #
Many roles require a background check, so the process is divided into two steps. Step one has items you can complete before the background check is completed, and step two has items to be completed after the background check is completed.
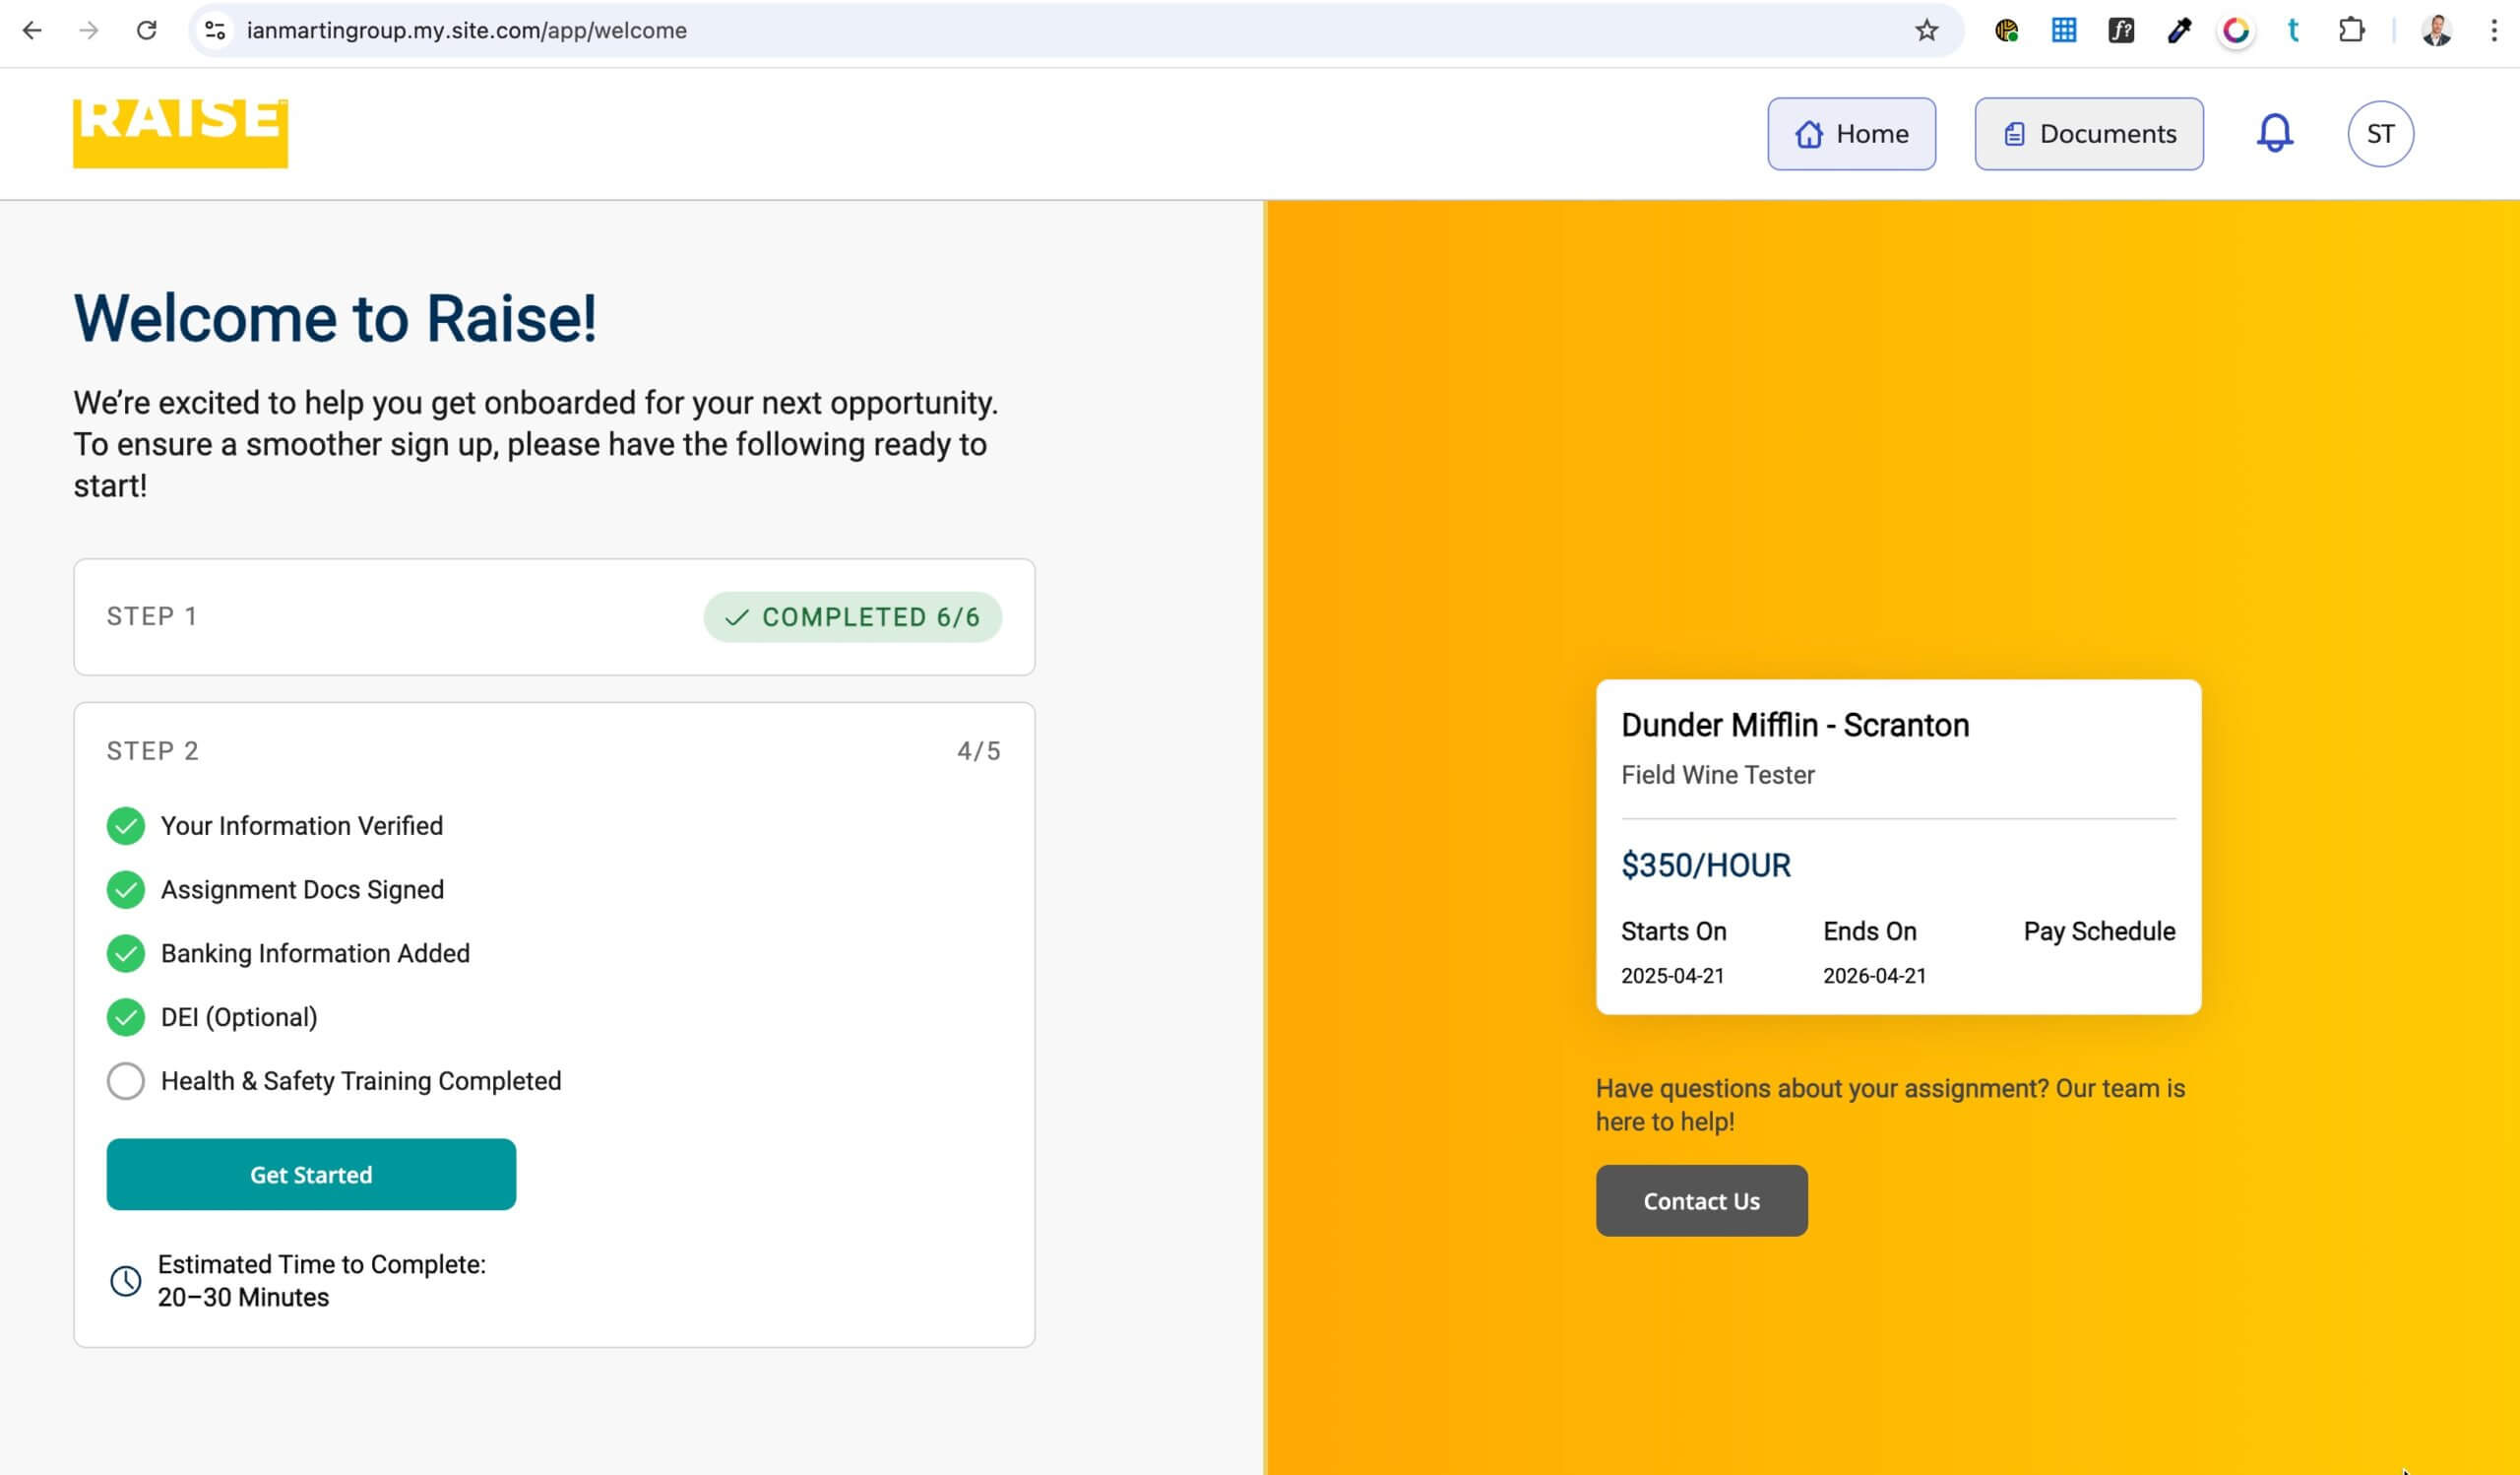
The Dashboard #
- When you sign in, you’ll end up on the Dashboard, an overview of your assignment.
- Look for My Onboarding in the top right. Click Continue.
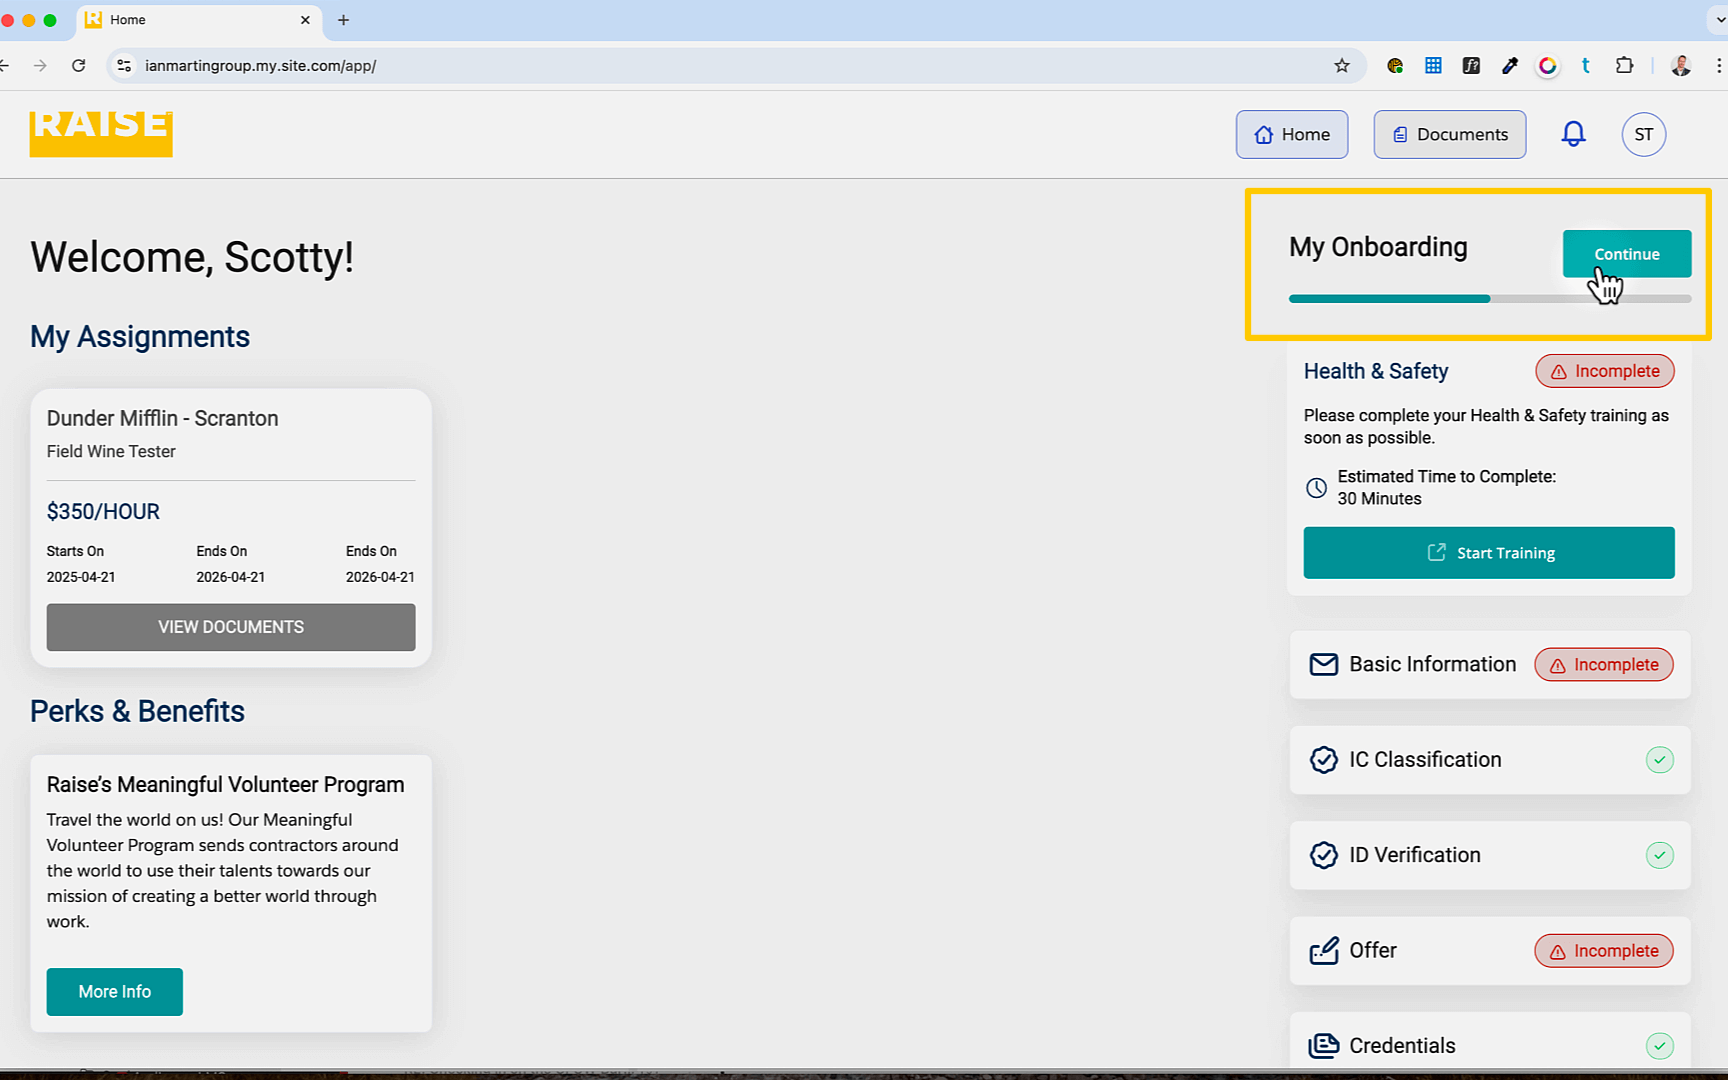
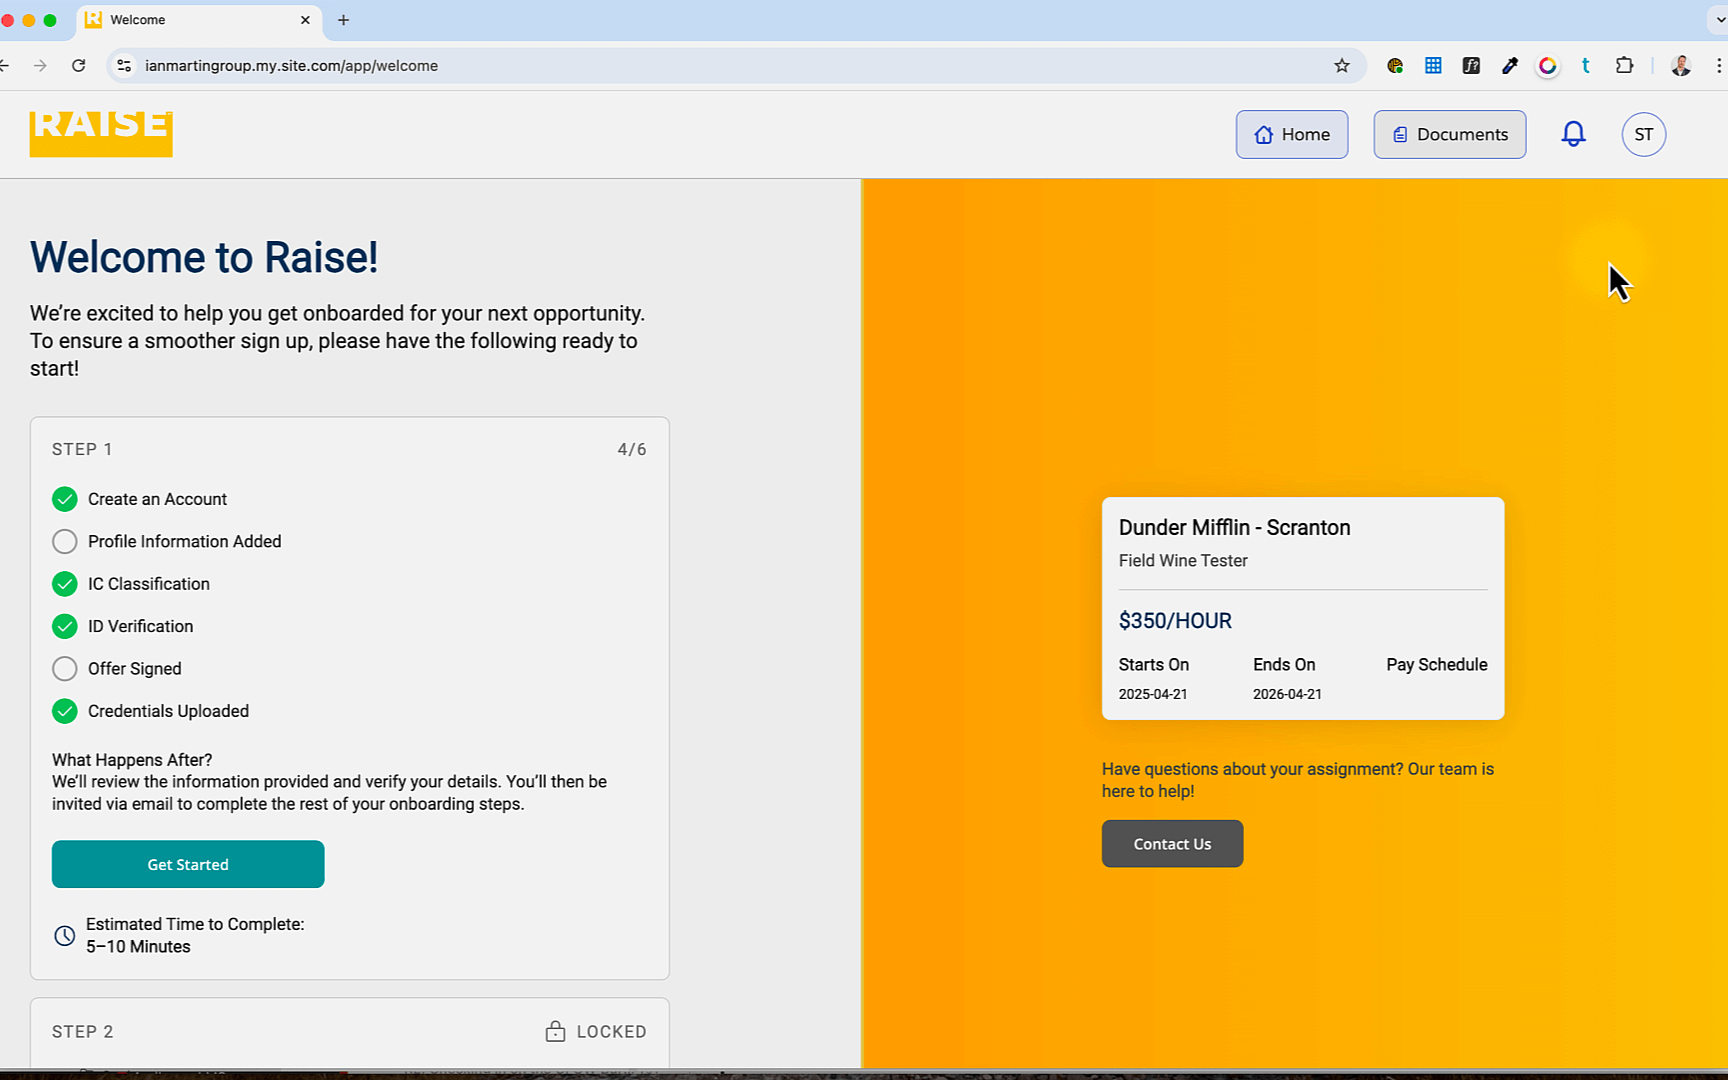
- You’ll be shown an overview of the onboarding steps, and will see your progress so far checked off.
- Click Get Started.
Enter your information #
Raise is your contracting agency, so we need to collect all the information required for to engage with your legal business, and have you work on this assignment with us.
- Enter your personal information as it appears on your government-issued documents (e.g., driver’s license, passport, etc.) Raise will use this throughout the onboarding process (including your Identity Verification in the next section).
- If there is another name you go by or prefer to be called that is different than your legal name as it appears on your government documents, enter it in the Preferred Name field.
- Enter your legal Business Name. This should be the name that you’ve registered with the Canada Revenue Agency.
- Enter your HST or GST number. This is usually 9 digits, and should not include letters or spaces (i.e., don’t include anything like “RT0001”.)
- Enter your business address. Again, this will be the address we use for government and tax documents.
- Click Continue.

- Enter the name and contact information of an emergency contact.
- Click Continue.
IC Classification Verification #
To verify that we’re able to enter into a business-to-business relationship with your legal incorporation, and to make sure that you should not be classified as a Contract (T4) employee, please answer the questions in the IC Classification section.
- Check the Acknowledgment of Independent Contractor Status and confirm that you are aware of what it means to operate as an Independent Contractor.
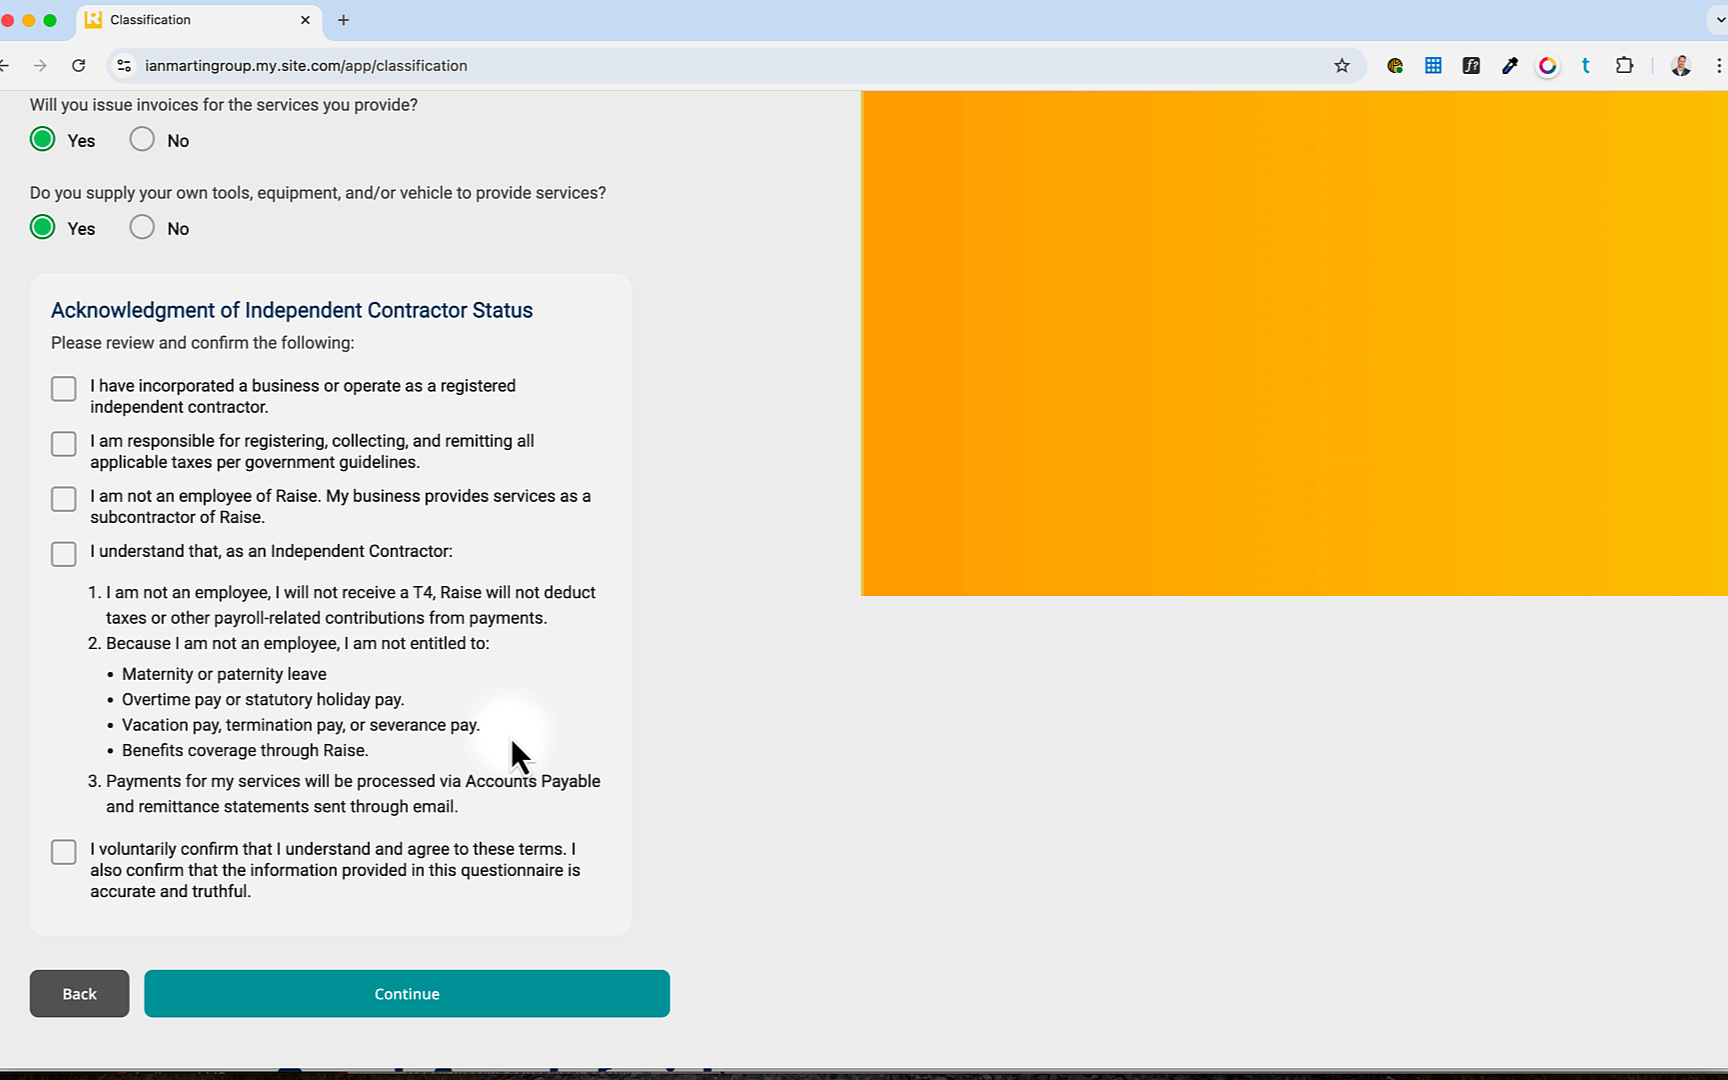
- Click Continue.
Identity Verification #
As your contracting agency for this assignment, Raise is legally required to verify your identity to ensure you’re legally allowed to work as an Independent Consultant in Canada. This includes confirming status (e.g., Canadian citizen, permanent resident, work permit holder, etc.) and helps us comply with Employment Standards, Immigration laws, and CRA (Canada Revenue Agency) rules.
We use Yoti to verify your identity remotely. Click here to learn more about Yoti and their services.
Complete your Identity Verification #
- Click Start Verification.
- You’ll get a notice that this will open in a new tab; click Continue to Verification.
For verification, you’ll need two pieces of ID. The application will give you a list of acceptable documents.
- If you’re currently working on a computer, Yoti gives you the option to use your computer’s webcam to take the photo, or switch to another device (like your phone camera)
- To use your computer’s camera (webcam): click Use computer.
- To use your phone camera: click Use smartphone.
- Yoti will display a QR code
- Use your smartphone camera to scan the QR code on the screen, and it will transfer the process to your smartphone.
- Tap the QR code to open the browser and continue on your smartphone.
- Tap Get started.
- Select where your document is from.
- You’ll see a list of accepted documents. Select your first document.
- The Yoti app will give you instructions on how to take the picture, making sure it’s clear and well-lit.
- Certain documents (like a driver’s license) require a photo of both the front side and the back side.
- Repeat the process with your second document.
- When both of your documents have been captured, the Yoti app on your smartphone and the Yoti app on your computer (if applicable) will let you know that you can close the application on your phone, close the tab on your computer, and return to the Raise app.
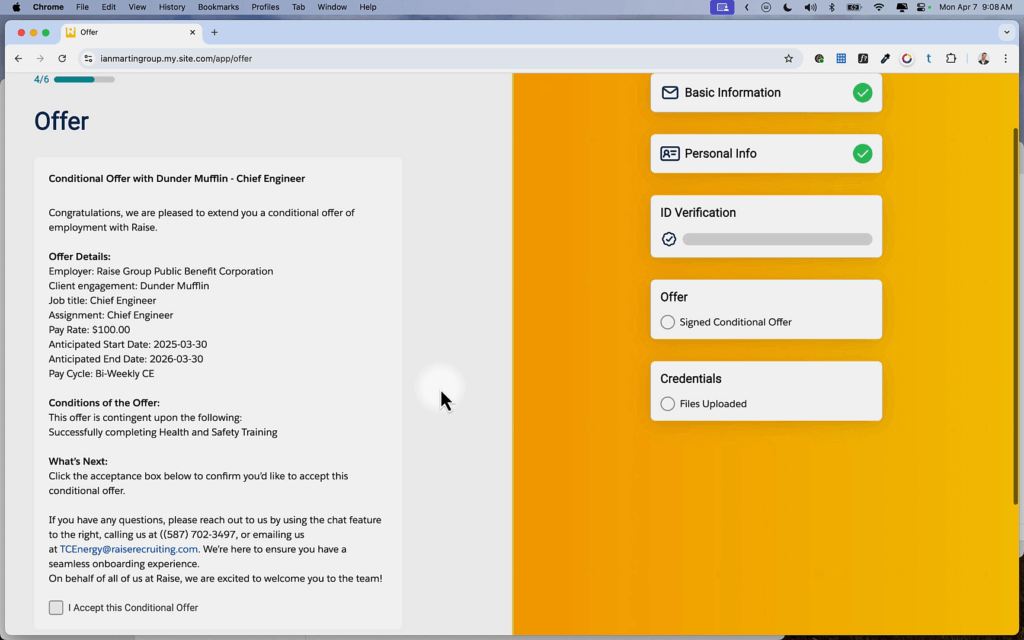
Agree to the Conditional Offer #
- Click to accept the conditional offer. This offer is dependent on all the requirements being met – such as completing onboarding and compliance courses, and the completion of the background check.
- You will complete your final Agreement (the “contract”) in Step 2.
- Click Continue.
Upload any required credentials #
If there are any specific credentials required (e.g., proof of General Liability, Worker’s Compensation clearance certificate, etc.) – it will be listed here.
- Either drag and drop a file from your computer into the box or click Browse to select and upload a file.
Step 1 completed #
Congratulations … you’ve completed Step 1 of your onboarding!
Look for an email from the Raise app welcoming you back to complete Step 2 of your onboarding.

Complete your Compliance (Health & Safety) courses #
Required compliance courses for your jurisdiction must be completed before your start date – so please take this pause in the Onboarding process to get those done.
- Click Start Training Now.
- You’ll see the courses required for your State or Province. Click the course to begin.
- The courses launch in a new browser tab. You’ll see a notification that it’s opening a new tab. Click Continue to Training.
- Your browser might block the pop-up from opening automatically (usually indicated with a warning message or an icon in your address bar)
- If so, click the Launch Course button to override the warning.
- Complete each of the required courses – upon completion you’ll see an Exit or Course Complete function, depending on the course. These courses track completion – so make sure you make it to the very end, so your completion is recorded.
- When you refresh your browser, your courses should show as complete.

Step 2: Agreement and Banking information #
When Raise has what we need to start Step 2, look for an email inviting you back to the App to complete your onboarding.

- Sign back in to the Raise app (click the Sign In button in the top right corner of this FAQ website).
- On the dashboard, click Continue.

- You will see the items in Step 1 are complete.
- Click Get started to begin Step 2.
Sign your Agreement and Assignment Documents #
- Below the list of Agreements to Sign, click Continue to Sign.
- A new window will open.
- Click the blue Get Started button in the top right corner.
- On the first page, you’ll be prompted to draw, type, or upload your initials.
- You can click either:
- Insert – which will insert your initials on this page to confirm your comprehension and agreement, and click Next to add your initials to each of the subsequent pages; or
- Insert everywhere – which will add your initials to all the pages to confirm your comprehension and agreement.
- Read through your agreement. At the bottom of the agreement, click the box labelled Click to sign.
- In the pop-up box, you’ll be prompted to draw, type, or upload your signature.
- You can click either:
- Insert – which will insert your signature on this page to sign the document, and click Next to add your signature to each of the subsequent documents; or
- Insert everywhere – which will add your initials to all the documents to confirm your agreement.
- When you’ve initialled all the pages and signed all the documents, click the blue I agree button in the top right.
Your documents are submitted. Click Close Click Continue at the bottom of the page to move to the next onboarding item.

Add your business banking information #
As this is a business-to-business relationship, and it’s your business that will be invoicing Raise, we need to deposit to a business (and not personal) account. Please enter:
- Your business bank account type (i.e., checking or savings);
- the Name on the Account (this should be consistent with your business banking documents);
- the Bank Name (e.g., Bank of Montreal, Royal Bank of Canada, CIBC, etc.)
- your Account number;
- your Transit number;
- your Institution number.
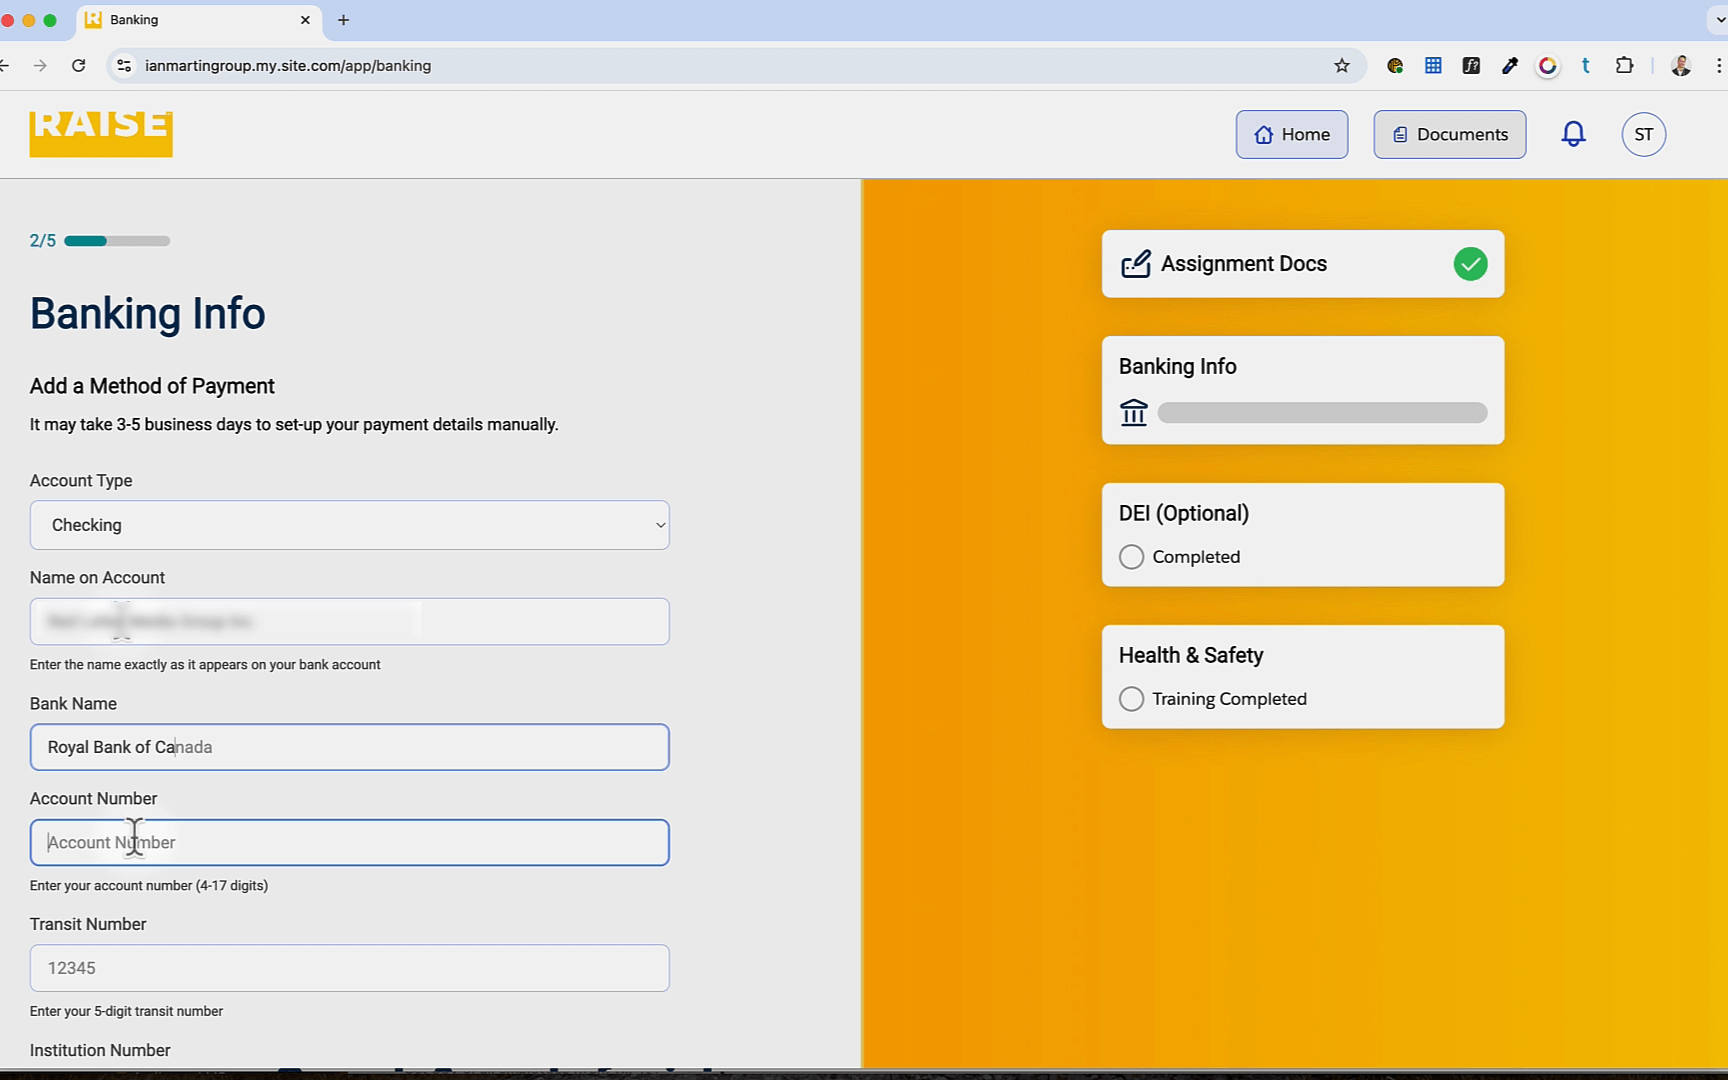
- Upload a Void cheque or Direct deposit form from your bank. This is a similar process to way you uploaded your credentials in previous steps.
Many banks allow you to download a direct deposit form from your online banking application. Contact your local branch for more information.
Optional: DEI #
We offer you the chance to participate in a survey survey gives Raise accurate data on the composition of our workforce so we can build teams that reflect the diversity of the communities we work in, create a working environment that encourages everyone’s participation, and ensure equitable access to opportunity for every candidate and employee.
Self-identification is voluntary. All data collected is treated confidentially and in no way will affect your eligibility for employment.
- When finished., or if you choose “No”, click Continue.

Complete your Compliance (Health & Safety) courses #
- If you haven’t already, complete the required courses for your jurisdiction. See this section above for more information.
Ready to work #
- When all your documents are complete and submitted, you’ll see a notice that you’re ready.
- You can download signed copies of your Agreement and documents for your records.
Get support on assignment #
If you’re stuck, please don’t hesitate to reach out! That’s what we’re here for: support@raiserecruiting.com.